
How to Change a Tire (and Jack Your Car Safely)
Learning how to change a tire is one of the most useful skills a driver can have — and the single most important part of it isn’t loosening lug nuts, it’s lifting the car safely. Get the jack in the right spot, on level ground, and the rest is straightforward. Put the jack in the wrong place, or on soft or sloped ground, and a routine flat can turn into a crushed body panel or a serious injury. This guide walks you through the whole process step by step, with an emphasis on doing it without getting hurt.
In This Article
- Tools You Need to Change a Tire
- Before You Start: Safety First
- Step-by-Step: How to Change a Tire
- Where to Put the Jack (Jacking Points)
- Roadside vs. Garage: Two Different Situations
- Common Mistakes That Cause Injuries
- When to Upgrade From the Factory Jack
- After the Change: What to Do Next
- Frequently Asked Questions
Whether you’re stranded on the shoulder or rotating tires in your own garage, the fundamentals are the same. We’ll cover the tools, the exact sequence, where to place the jack, and the mistakes that send people to the emergency room every year. If you already know the basics and just want to lift safely, jump to where to put the jack.
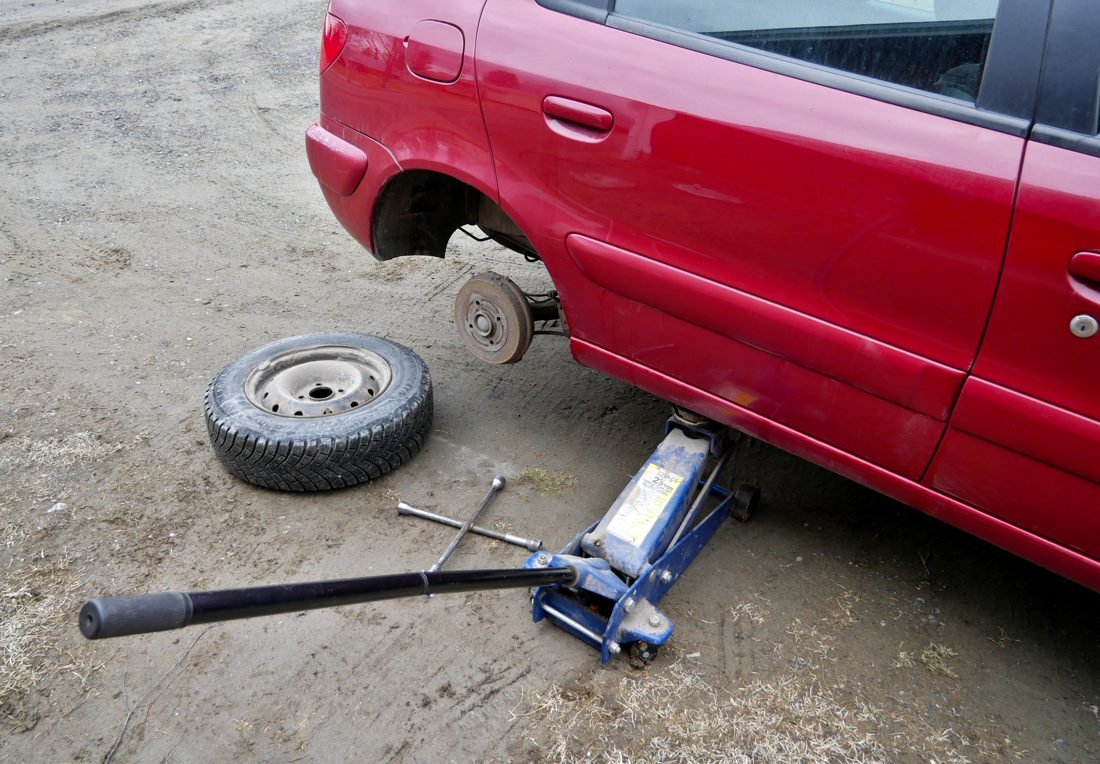
Tools You Need to Change a Tire
Every car sold in North America is supposed to come with the minimum tools to change a flat. They’re usually tucked under the trunk floor, behind a side panel in the cargo area, or under the rear seats. Before you ever need them, find them and make sure they’re all there.
The Bare Minimum (What Comes With the Car)
- Spare tire — either a compact “donut” temporary spare or a full-size matching tire.
- Scissor jack — the small, folding jack that raises the car. Adequate for one quick tire change, and nothing more.
- Lug wrench — an L-shaped or cross-shaped wrench that fits your lug nuts. Some are combined with the jack handle.
- Wheel lock key — if your wheels have anti-theft locking lug nuts, you need the matching key socket. It’s usually in the glovebox or with the tools.
What Makes the Job Much Easier
The factory kit gets you home, but a few inexpensive additions turn a miserable roadside struggle into a quick, safe job:
- Wheel chocks — even a pair of wedge-shaped chocks (or a couple of bricks) stop the car from rolling while it’s on the jack.
- Gloves — road tires are filthy and lug nuts are often razor-edged with rust.
- A short length of pipe — slid over the lug wrench, it gives you leverage on stubborn, over-torqued lug nuts.
- A flashlight or headlamp — most flats happen at the worst possible time, in the dark or the rain.
- A torque wrench — the correct way to tighten lug nuts to spec. Keep one in the garage even if not in the car.
- Reflective triangles or flares — for roadside visibility. Legally required in commercial vehicles for good reason.
Do this today: Pull your spare out and check its air pressure. A flat spare is useless, and temporary spares slowly lose pressure sitting in the trunk for years. Also confirm your jack and lug wrench are actually in the car and that the wrench fits your lug nuts. The worst time to discover a missing tool is on the shoulder of a highway.
Before You Start: Safety First
More people are hurt setting up to change a tire than by the tire change itself. The car falling off the jack, the car rolling, or being struck by traffic are the three real dangers. Handle all three before you touch a lug nut.
1. Get to a Safe, Level Spot
The most important word here is level. A jack only works safely on firm, flat ground. If you’re on the road, get the car as far onto the shoulder as you can — past the fog line, onto solid ground, ideally on a straight section where oncoming drivers can see you from a distance. Avoid stopping on a curve, on a bridge, or in a blind spot over a hill. Never change a tire in a live traffic lane if there is any alternative, including driving slowly (with a flat) to the next exit or a wide, flat pull-off. A ruined rim is far cheaper than a hospital visit.
On soft ground — dirt, gravel, grass, or sand — the jack can sink and tip under load. If you must lift on a soft surface, put a flat, sturdy board (a “jack pad”) under the jack base to spread the weight. In a garage or driveway, a level concrete slab is ideal.
2. Secure the Car
- Put the transmission in Park (automatic) or in gear (manual).
- Set the parking brake firmly.
- Chock the wheels at the opposite corner from the one you’re lifting. If you’re lifting the front-right wheel, chock the rear-left wheel, front and back if you have two chocks.
- Turn off the engine.
3. Make Yourself Visible
Turn on your hazard lights the moment you realize you have a flat, and leave them on the whole time. If you carry reflective triangles or flares, place them behind the car — roughly 10, 100, and 200 feet back gives approaching drivers time to move over. Get all passengers out of the car and well away from traffic before you start working.
Step-by-Step: How to Change a Tire
Here’s the full sequence. Read it through once before you start so you understand why the order matters — especially loosening lug nuts before you lift, and torquing them after you lower.
Step 1: Loosen the Lug Nuts (Before Lifting)
With the flat tire still on the ground, use the lug wrench to loosen each lug nut about a quarter to half a turn — counterclockwise (“lefty loosey”). Do not remove them yet. The point of doing this now is that the tire’s contact with the ground stops the wheel from spinning while you break the nuts free. If a nut is stubborn, position the wrench so you can push down with your leg or body weight rather than yanking up, and use a pipe for leverage if needed. If your car has a wheel lock, fit the key socket first.
Step 2: Position the Jack at the Correct Jack Point
Find the reinforced jack point nearest the flat tire (see the next section for exactly where these are). Slide the jack under it and raise the jack by hand until its saddle just contacts the jack point, snug but not yet lifting. Double-check that the jack is straight up and down, sitting squarely on level ground, and that its saddle is seated on the reinforced seam and not on plastic trim, the exhaust, or a suspension part.
Step 3: Raise the Car
Turn the jack handle to raise the car until the flat tire is about 4-6 inches off the ground — enough that the spare, which is inflated and slightly larger than a flat tire, will clear when you fit it. Lift smoothly and stop if the car shifts, leans, or the jack starts to tilt; if that happens, lower it and reposition. Never put any part of your body under the car while it’s on the jack.
Step 4: Remove the Lug Nuts and the Flat Tire
Now fully unscrew the lug nuts and set them somewhere they won’t roll away — an upturned hubcap or your pocket works. Grip the tire at the 9 and 3 o’clock positions and pull it straight toward you off the wheel studs. Set the flat aside, laying it flat and sliding it partway under the car’s frame (not under your work area) as a backup in case the jack fails.
Step 5: Mount the Spare
Lift the spare onto the wheel studs, lining up the bolt holes. Push it flush against the hub. Thread on the lug nuts by hand and snug them down as far as you can with your fingers, then a little with the wrench — but don’t fully torque them while the wheel is in the air, because the wheel will just spin.
Step 6: Lower the Car and Torque the Lug Nuts
Lower the jack until the spare touches the ground and is bearing some weight but the car isn’t fully down. Now tighten the lug nuts firmly in a star (crisscross) pattern — never in a circle — so the wheel seats evenly against the hub. Lower the car the rest of the way, remove the jack, and do a final torque pass. If you have a torque wrench, tighten to the spec in your owner’s manual (commonly 80-100 lb-ft for cars; more for trucks). If you only have the factory wrench, get it snug and re-torque properly as soon as you can.
Step 7: Stow Everything and Check Pressure
Put the flat, the jack, and all the tools back in the car. Check the spare’s air pressure if you can — temporary spares often require a higher pressure (around 60 psi) than a normal tire. Then drive gently to a shop or your garage.
Where to Put the Jack (Jacking Points)
This is the part people get wrong, and it’s the part that damages cars and causes accidents. A car’s body is thin sheet metal in most places. It has only a few reinforced spots designed to bear the car’s weight through a jack. Lifting anywhere else can dent the floor pan, crush the rocker panel, or bend a suspension component.
Finding the Factory Jack Points
On the vast majority of modern unibody cars, the jack points are the pinch-weld seams — the vertical flanges of doubled-over steel that run along the bottom edge of the body, just inboard of each wheel. Manufacturers mark the correct spot with a notch, arrow, or triangle stamped into the plastic body cladding or the pinch weld itself. There’s typically one behind each front wheel and one ahead of each rear wheel.
The scissor jack that came with your car has a slotted saddle specifically shaped to cradle the pinch weld. That’s a strong hint that the pinch weld is where it belongs. When you use a flat-saddle floor jack in the garage, a rubber pinch-weld adapter or a slotted puck protects that seam from being crushed.
Your owner’s manual has a diagram showing the exact jack points for your specific vehicle — this is the single most reliable source. Trucks, body-on-frame SUVs, and some performance cars use different points (frame rails, subframe, or dedicated lift pads), so never assume. Our full walkthrough on where to jack up your car, jacking points and pinch welds covers how to identify them on different vehicle types and how to protect the seam.
Never jack on: the oil pan, the transmission pan, the exhaust, plastic body panels, a control arm or other suspension link, or the middle of the floor pan. These will bend, crack, or leak under the car’s weight, and can let the car slip off the jack.
Roadside Jacking vs. Garage Jacking
The little scissor jack in your trunk lifts from the same pinch-weld points, but it’s a one-job tool: it’s narrow, has a small footprint, and is only stable enough for a quick tire swap on level ground. In the garage, you’ll use a hydraulic floor jack that rolls under the car, lifts faster, and reaches a taller height — and then you place jack stands under rated support points before doing any work underneath. That combination is what makes garage work safe. The scissor jack is strictly for changing a tire and getting moving again.
Roadside vs. Garage: Two Different Situations
Changing a tire on the highway shoulder and rotating tires in your driveway are the same mechanical task with very different risk profiles. The tools and safety priorities shift.
| Factor | Roadside (Emergency) | Garage / Driveway (Planned) |
|---|---|---|
| Biggest danger | Passing traffic | Car falling off the lift |
| Jack used | Factory scissor jack | Hydraulic floor jack |
| Support underneath | None — quick change only | Jack stands (mandatory before going under) |
| Surface | Whatever is available (get level) | Level concrete |
| Time pressure | High — get off the road | None — take your time |
| Lug nut tightening | Snug now, torque later | Torque wrench to spec |
The key takeaway: at the roadside, you’re changing a tire and nothing more, as fast as safety allows. In the garage, you have the luxury of doing it right — proper jack, jack stands, torque wrench, level floor. If you find yourself doing tire work regularly, investing in a good floor jack and a set of stands pays for itself in convenience and safety. For heavier or more frequent work, some home mechanics step up to a lift; our comparison of a car lift versus jack stands lays out when that upgrade makes sense.
Common Mistakes That Cause Injuries
Almost every tire-change accident traces back to one of these. Avoid them and the job is genuinely low-risk.
Do This
- Loosen lug nuts before lifting
- Lift only on level, firm ground
- Use the marked pinch-weld jack points
- Chock the opposite wheels
- Torque lug nuts in a star pattern
- Keep your body out from under the car
Never Do This
- Reach or slide under a car on a jack
- Jack on soft, sloped, or gravel ground
- Lift from the oil pan or a suspension arm
- Tighten lug nuts in a circle
- Change a tire in a live traffic lane
- Trust a scissor jack for real repair work
Lifting Without Chocking
A car on a jack can roll off it if the opposite wheels aren’t blocked, especially on any slope. Two wheel chocks (or bricks) cost almost nothing and eliminate this risk entirely.
Over-Tightening or Under-Tightening Lug Nuts
Cranking lug nuts as hard as you physically can, or worse, using an impact gun on the “max” setting, can stretch or snap the studs and warp the brake rotor. Too loose, and the wheel can work its way off while driving. The right answer is a torque wrench set to the manufacturer’s spec, in a star pattern, then a re-check after 50-100 miles of driving.
Getting Underneath a Jacked Car
This is the one that kills people. A jack — factory or hydraulic — is a lifting device, not a holding device. Hydraulic seals fail, jacks tip, ground shifts. If any part of you needs to go under the car, the car must be supported on rated jack stands first, every single time.
When to Upgrade From the Factory Jack
The scissor jack in your trunk is fine for the rare roadside flat. But if you’re doing your own tire rotations, seasonal tire swaps, brake jobs, or oil changes, it quickly becomes the slow, wobbly, knuckle-scraping weak link. Two upgrades transform garage tire work:
A Real Floor Jack
A hydraulic floor jack rolls under the car, lifts with a few pumps of the handle, reaches a much taller height, and is dramatically more stable than a scissor jack. A 2-to-3-ton unit covers virtually all cars and light trucks. Low-profile models fit under lowered vehicles. If you’re shopping, our guide to the best floor jacks for home garages breaks down capacity, lift height, and which models are worth the money.
Jack Stands
A floor jack lifts the car; jack stands hold it. Any time you’re going to remove more than one wheel, or do anything beyond a straight tire swap, put the car on stands rated for its weight before you commit. A quality set of stands is one of the cheapest pieces of safety equipment you can own. See our picks for the best jack stands and how to size them to your vehicle.
The Bottom Line
Changing a tire is a skill every driver should have, and it’s not hard — but it lives or dies on how you lift the car. Level ground, the correct pinch-weld jack point, chocked wheels, and staying out from under the car cover the safety essentials. At the roadside, change the tire quickly and move on. In the garage, upgrade to a proper floor jack and jack stands, and the job becomes fast, safe, and almost pleasant.
After the Change: What to Do Next
Getting the spare on is only half the job. Finish the process so you’re not caught out again.
- Check the spare’s pressure. Temporary spares often need around 60 psi. If it’s low, fill it at the first gas station.
- Mind the speed and distance limits. Compact “donut” spares are typically rated for under 50 mph and roughly 70 miles. They have less grip and no tread for wet weather. Drive gently and directly to a repair shop.
- Get the flat repaired or replaced fast. A nail in the tread can often be plugged or patched inexpensively; sidewall damage means a new tire. Don’t put off dealing with it — you’re driving without a backup until you do.
- Re-torque the lug nuts. After 50-100 miles, re-check the lug nut torque with a proper wrench. Freshly mounted wheels can settle slightly.
- Restock your kit. If you used flares or gloves, replace them so the kit’s ready for next time.
If your flat came from an alignment or wear issue rather than a nail, it’s worth having the vehicle looked at — uneven wear points to alignment or suspension problems. A shop can advise, and if you’re curious about typical costs, our reference on wheel alignment cost gives realistic ranges.
Frequently Asked Questions
How do you change a tire step by step?
Park on level ground, set the parking brake, and turn on your hazards. Loosen the lug nuts a quarter turn while the tire is still on the ground. Place the jack at the correct jack point nearest the flat and raise the car until the tire clears the ground. Remove the lug nuts and the flat, mount the spare, hand-tighten the lug nuts, lower the car, then torque them in a star pattern. Stow your gear and check the spare’s pressure.
Where do you put the jack when changing a tire?
Under a reinforced jack point — never the floor pan, exhaust, oil pan, or a suspension arm. On most modern cars these are the pinch-weld seams just inside each wheel, usually marked with a notch or arrow. Your owner’s manual shows the exact spots. See our full guide to jacking points and pinch welds.
Is it safe to change a tire on the side of the road?
It can be, but a live roadside is dangerous. Get fully off the road onto solid, level ground, turn on your hazards, set out triangles or flares if you have them, and keep passengers well away from traffic. If you can’t get safely clear, or the ground is soft or sloped, call roadside assistance instead.
How tight should lug nuts be after changing a tire?
Torque them to your owner’s manual spec, commonly 80-100 lb-ft for cars (more for trucks), in a star pattern using a torque wrench. If you tightened by hand at the roadside, re-torque properly as soon as you can and re-check after 50-100 miles.
Can I use the car’s jack to lift the car for other repairs?
No. The factory scissor jack is only for a quick roadside tire change — it’s narrow and unstable. Never get under a car held up only by a jack. For garage work, lift with a hydraulic floor jack and support the car on jack stands before going underneath.
How long does it take to change a tire?
A first-timer working carefully needs about 20-30 minutes; with practice and good tools, roughly 15. Don’t rush — most mistakes and injuries come from hurrying rather than placing the jack correctly and torquing the lug nuts properly.
Do I need to replace a full-size tire or is the spare fine?
Most cars carry a compact “donut” spare rated only for short trips at low speed (usually under 50 mph, about 70 miles) — it’s meant to get you to a shop, not to drive on long-term. Get the flat repaired or replaced with a full-size tire as soon as possible.