The answer
Before storage: fill the tank, add stabilizer, and run the engine 5 minutes to block ethanol damage and tank rust.
Compiled by Car Lift Lab from verified manufacturer specifications across 600+ car lift models.
Motorcycle Storage Guide: Long-Term & Winter Tips
Storing a motorcycle wrong costs more than storing it right. When shopping for a motorcycle storage, the details matter. A $5 bottle of fuel stabilizer prevents a $300 carb rebuild. A $25 battery tender saves a $100 battery. A $15 cover stops $500 in sun damage to your seat and paint. The whole prep process takes about an hour and pays for itself every time.
In This Article
Whether you are parking for winter, deploying for six months, or shelving a project bike indefinitely, the steps are the same. Here is the complete checklist — from fuel system to security — with the gear that makes it easier.
Key Takeaways
- Fuel: Fill the tank, add stabilizer, run the engine 5 minutes. Prevents ethanol damage and rust inside the tank.
- Battery: Connect a battery tender (maintainer). A dead battery after storage is the #1 preventable problem.
- Oil: Change oil and filter before storage, not after. Used oil corrodes engine internals.
- Tires: Inflate to max sidewall pressure. Store on a center stand, dolly, or lift to prevent flat spots.
- Cover and security: Breathable cover to prevent moisture. Disc lock + alarm for theft deterrence.
- Do NOT start the engine periodically unless you ride it to full operating temperature (15+ minutes).
Table of Contents
Pre-Storage Checklist
Do all of these before the bike goes into hibernation. Skipping any step creates a problem you will discover at the worst possible time — the first warm day of spring when you just want to ride.
1. Fuel System
Modern E10 gasoline starts degrading in 30 days. Ethanol absorbs moisture from the air, and that water separates from the gasoline and settles to the bottom of the tank. The water corrodes the tank lining, clogs carb jets, and damages fuel injectors.
What to do:
- Fill the tank to at least 95% capacity. A full tank minimizes the air space where condensation forms.
- Add fuel stabilizer per the bottle’s instructions (typically 1 oz per 2.5 gallons). Sta-Bil Storage (red bottle) and Sea Foam Motor Treatment are the two most trusted products. Either works.
- Run the engine for 5 minutes to circulate stabilized fuel through the entire system — carbs, injectors, fuel rail, and return lines.
- For carbureted bikes, some mechanics also recommend turning the petcock to OFF after the engine stabilizes, then letting the engine run until it stalls to drain the carb bowls. This is a belt-and-suspenders approach, and opinions vary. With stabilizer in the fuel, it is optional.
2. Battery
A motorcycle battery loses 1-3% of its charge per day sitting idle. In 30-60 days, it is dead. Deep discharging a lead-acid or AGM battery permanently reduces its capacity. Three or four full discharge cycles and the battery is junk.
What to do:
- Connect a battery tender (also called a battery maintainer). This is a small smart charger ($20-$40) that monitors voltage and trickle-charges the battery only when needed. Popular models: Battery Tender Junior ($25), NOCO Genius1 ($30), Optimate 4 ($45).
- If you do not have access to an outlet in the storage area, disconnect the battery negative terminal. This prevents parasitic drain from the bike’s electronics. The battery will still self-discharge slowly, but much slower than connected.
- If the battery is more than 3 years old, test it with a multimeter before storage. A weak battery that barely starts the bike in October will be dead by March regardless of a tender.
3. Oil and Filter
Used motor oil contains combustion acids, microscopic metal particles, and moisture. Leave it sitting in the engine for months and it corrodes bearing surfaces, cylinder walls, and cam journals. Fresh oil provides a clean protective barrier.
What to do:
- Change the oil and filter. Use the manufacturer-recommended oil weight and a quality filter.
- Run the engine for 2-3 minutes to circulate the new oil through the entire system.
- Check the oil level after the engine cools. Top off if needed.
You do not need to change the oil again in spring if the bike was properly stored. Just check the level and ride.
4. Tire Pressure
Tires lose 1-2 PSI per month naturally. Over a 5-month winter, that is 5-10 PSI — enough to create a flat spot where the tire contacts the ground under the bike’s weight.
What to do:
- Inflate both tires to the maximum pressure listed on the tire sidewall (not the bike’s recommended riding pressure). The higher pressure resists flat-spotting better.
- Ideally, store the bike on a center stand, motorcycle dolly, or lift table so the tires are either unloaded or the weight is distributed differently than normal riding position.
- If storing on the kickstand, rotate the front tire 90 degrees monthly and roll the bike forward a few inches to change the rear contact patch.
5. Coolant (Liquid-Cooled Bikes)
If your bike is liquid-cooled, check the coolant level and condition. Coolant that is more than 2 years old may have degraded antifreeze properties. In unheated storage where temperatures drop below freezing, degraded coolant can freeze and crack the engine cases or radiator.
What to do:
- Check coolant level in the overflow reservoir. Top off if low.
- If the coolant is more than 2 years old or the freeze protection is uncertain, flush and replace with fresh 50/50 premix rated to at least -30°F.
- Check for leaks at hose connections and the water pump weep hole.
6. Drive Chain (Chain-Drive Bikes)
A clean, lubed chain resists rust during storage. A dirty, dry chain develops surface corrosion that accelerates wear when you start riding again.
What to do: Clean the chain with chain cleaner and a brush. Let it dry. Apply a heavy coat of chain lube — more than you would for riding. The thick layer acts as a rust barrier during storage.
Cleaning and Prep
Wash the bike before storage. Dirt, road salt, bug residue, and brake dust are all mildly corrosive. Left on the bike for months, they etch into paint, chrome, and aluminum surfaces.
Wash: Standard bike wash with automotive soap and water. Pay attention to the undersides, wheel wells, and engine cases where road grime accumulates. Rinse thoroughly — soap residue attracts moisture.
Dry: Blow dry or towel dry completely. Moisture trapped under bodywork or in crevices causes corrosion during storage. A leaf blower works great for blasting water out of hard-to-reach spots.
Protect: Apply a light coat of spray wax or motorcycle-specific protectant to paint and chrome. Apply a thin film of WD-40 or corrosion inhibitor (ACF-50, XCP Rust Blocker) to exposed metal surfaces — fork tubes, handlebar clamps, brake rotors (wipe rotors clean before riding). Do not coat rubber or plastic with petroleum-based products.
Exhaust: Plug the exhaust tips with steel wool or dedicated exhaust plugs. This prevents moisture from entering the exhaust system and, more importantly, keeps mice out. Mice love nesting in exhaust pipes.
Storage Location Options
Heated Garage (Best)
A climate-controlled garage is the ideal storage environment. Stable temperatures prevent condensation, the roof keeps rain and snow off, and you have access to electrical outlets for a battery tender. If you have a heated garage, your storage prep is straightforward and the bike will be in perfect condition come spring.
A motorcycle lift table in a heated garage doubles as both a work platform and a storage perch. The bike stays off the ground, out of the way, and at comfortable working height if you want to do maintenance during storage. This is the ultimate setup for riders who also wrench on their bikes.
Unheated Garage or Shed
The most common storage situation. Temperatures fluctuate with the weather, which means condensation forms on metal surfaces during warm-cold cycles. Extra attention to moisture prevention is needed: corrosion inhibitor on exposed metal, a breathable cover, and silica gel or a dehumidifier near the bike.
Make sure the coolant freeze protection is adequate for your coldest expected temperature. An unheated detached garage in Minnesota can hit -20°F — standard 50/50 coolant handles that, but only if it is fresh.
Outdoor (Covered)
A carport, lean-to, or covered parking spot keeps rain and snow off the bike but offers no temperature control and limited security. A high-quality, breathable motorcycle cover is essential — not a tarp, which traps moisture. Weight the cover or strap it down so wind does not whip it against the paint.
Outdoor storage increases the importance of security gear: disc locks, chains, covers, and GPS trackers. A visible disc lock deters opportunistic theft; a GPS tracker helps recovery if the lock fails.
Self-Storage Unit
Climate-controlled units work well but are expensive ($100-$200/month). Non-climate units have the same condensation issues as unheated garages. The advantage of a storage unit is security — locked facility, limited access, sometimes video surveillance. The disadvantage is inconvenience — you cannot easily check on the bike monthly.
If using a storage unit, do all your prep at home, ride to the unit, complete the final steps (battery tender if outlet available, cover), and leave it. Make sure the battery tender is a quality smart charger that will not overcharge — you are trusting it unattended for months.
Motorcycle Covers
A cover does three things: blocks UV, repels water, and hides the bike from thieves. Indoor covers prioritize dust protection and breathability. Outdoor covers prioritize waterproofing and UV resistance.
| Cover Type | Best For | Key Feature | Price Range |
|---|---|---|---|
| Indoor dust cover | Heated/unheated garage | Soft, breathable, scratch-free lining | $25-$60 |
| All-weather outdoor cover | Carport, outdoor parking | Waterproof outer, breathable inner, UV resistant | $40-$100 |
| Half cover (top only) | Under a roof, quick protection | Covers seat, tank, handlebars only | $20-$40 |
| Premium fitted cover | Show bikes, long-term storage | Custom fit, fleece lining, lock grommets | $80-$200 |
Critical rule: Never cover a motorcycle with a plastic tarp. Tarps trap moisture against the bike’s surfaces and create a greenhouse effect on warm days. The trapped humidity causes more corrosion than leaving the bike uncovered. Always use a breathable fabric cover that allows moisture to evaporate.
Security: Locks, Alarms, and GPS
A stored motorcycle is a stationary target. It sits in the same place for weeks or months, visible to anyone who walks by. Layered security makes theft harder and recovery more likely.
Layer 1: Physical Locks
Disc lock: A hardened steel lock that clamps onto the brake rotor. The bike cannot roll without dragging the locked rotor. Good disc locks cost $30-$80 (Kryptonite, ABUS, Oxford). Cheap ones from Amazon marketplace sellers can be cut with bolt cutters — do not bother.
Chain lock: A hardened chain looped through the frame and around an immovable anchor (pillar, ground anchor, sturdy rack). Chains rated at 14mm+ are resistant to bolt cutters. Kryptonite New York chain ($80-$120) and Oxford Monster ($90-$130) are among the best. Pair with a quality padlock or integrated lock.
Steering lock: Use the bike’s built-in steering lock. It is breakable with enough force, but it adds another step for a thief. Every layer counts.
Layer 2: Alarms
Vibration-sensitive alarms emit a loud siren when the bike is moved or bumped. Standalone units ($20-$50) attach to the bike or sit nearby. Some disc locks include built-in alarms (ABUS Detecto, Oxford Boss Alarm). The alarm will not prevent a determined thief with a van and a ramp, but it draws attention and deters opportunistic theft.
Layer 3: GPS Tracking
A hidden GPS tracker ($50-$150 device plus $5-$15/month cellular service) lets you locate the bike if it is stolen. Monimoto, Invoxia, and Apple AirTag (budget option with limitations) are popular choices. Hide the tracker somewhere non-obvious — under the seat, inside the airbox, or taped inside a fairing panel. GPS does not prevent theft, but it dramatically improves recovery odds.
Layer 4: Visibility
A covered bike is less tempting than an uncovered one. A cover hides the make, model, and condition — all things a thief evaluates when choosing targets. A cheap cover that hides the bike is better security than an expensive lock that is visible.
Moisture and Pest Prevention
Moisture
Condensation is the enemy. Every warm-cold cycle deposits moisture on metal surfaces. Over months, even light condensation causes surface corrosion on chrome, bare steel, and aluminum.
- Corrosion inhibitor: ACF-50 or XCP Rust Blocker sprayed on exposed metal surfaces before covering. These products displace moisture and leave a protective film. One application lasts the entire storage period.
- Silica gel packs: Place 2-3 large silica gel packs (or a rechargeable dehumidifier box) under the cover near the engine and inside the tank (hang them from the filler cap on a string). They absorb ambient moisture and reduce condensation.
- Dehumidifier: In a closed garage or storage unit, a small plug-in dehumidifier ($30-$60) keeps ambient humidity below 50% — the threshold where corrosion accelerates. Worth the electricity cost if you are storing multiple bikes or a valuable machine.
Pests
Mice are the main threat. They nest in airboxes, exhaust pipes, and under seats. They chew wiring, air filter elements, and seat foam. A mouse nest in your airbox can cause a no-start condition in spring that takes hours to diagnose.
- Exhaust plugs: Steel wool in the exhaust tips. Mice cannot chew through steel wool. Dedicated exhaust plugs ($5-$10) work too.
- Airbox: Stuff a wad of steel wool loosely into the intake. Do not pack it tight — you need to remember to remove it before starting. Put a bright tag on the handlebars that says “CHECK AIRBOX.”
- Repellents: Mothballs or peppermint oil-soaked cotton balls near the bike. Do not place mothballs directly on paint or plastic — the chemicals can damage finishes. Place them on the floor around the bike.
- Traps: Standard snap traps around the perimeter of the storage area. Check and reset monthly. This is the most effective long-term solution — repellents work for a while, but traps solve the problem permanently.
Using Lifts and Dollies for Storage
Storing a motorcycle on a lift table or dolly has real advantages over parking it on the kickstand.
Lift Table Storage
A motorcycle lift table keeps the bike at a convenient height for monthly check-ins, makes it easy to rotate tires and check fluids, and keeps the bike off cold concrete. Some riders use the storage period to tackle maintenance projects — a bike on a lift table at 30 inches is much more pleasant to work on than one on the ground.
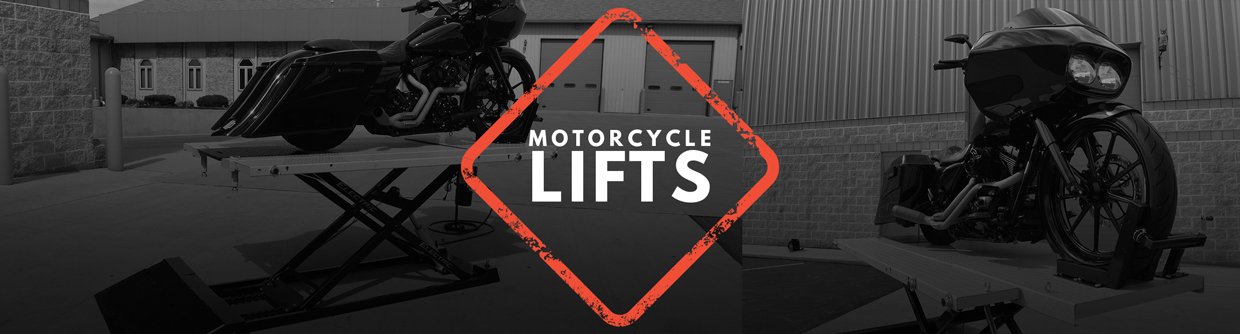
If you are investing in a lift for maintenance anyway, using it for storage is a bonus. The bike sits on its tires in a natural position, the integrated wheel chock keeps it upright, and you free up floor space underneath for other gear. Browse our motorcycle lift options for tables that work for both maintenance and storage.
Dolly Storage
A motorcycle dolly keeps the bike mobile during storage. When you need to shuffle bikes, clean the garage floor, or access the bike for a monthly check, you roll it out on the dolly instead of duck-walking it. For garages with multiple bikes, dollies are essential for space management.
Platform dollies with integrated wheel chocks are the best storage dollies because the bike stands upright and secure without the kickstand. The bike sits level, distributing weight evenly on both tires, which prevents flat spots better than the angled kickstand position.
Monthly Check-In Routine
A 10-minute visit once a month catches problems before they become expensive. Here is what to check:
- Tire pressure: Check both tires. Add air if they have dropped more than 5 PSI from your storage target. Rotate the front tire 90 degrees and roll the bike forward a few inches to change the rear contact patch.
- Battery tender: Check the indicator light. Green means maintaining. Red or no light means the tender has a problem or the battery is toast. If the tender is not connected (because there is no outlet), check battery voltage with a multimeter — should be 12.4V or higher.
- Fluid leaks: Look under the bike for puddles or drips. Check the fork seals, engine cases, and coolant hoses. A slow leak that is fine for a day becomes a problem over 5 months.
- Cover and pest signs: Check the cover for moisture inside. Look for mouse droppings on the floor, chewed material near the bike, or disturbed steel wool in the exhaust and airbox. Reset traps if needed.
- Security devices: Make sure disc locks, chains, and alarms are still in place and functional. Test the alarm once. Check GPS tracker battery level if applicable.
Document each check with a quick phone photo. If something changes between visits, you will have a record to compare against.
Starting Up After Storage
Spring is here. Here is the de-winterization sequence, step by step.
- Remove pest barriers: Pull the steel wool from the exhaust and airbox. Check the airbox and air filter for nesting material or damage. Remove mothballs and repellents.
- Remove the cover: Inspect the bike for any damage, corrosion, or fluid leaks that developed during storage.
- Battery: Disconnect the tender. Check voltage (should be 12.6-12.8V for a fully charged battery). Reconnect the battery if it was disconnected.
- Tire pressure: Set both tires to the manufacturer’s recommended riding pressure (which is lower than the max sidewall pressure you stored them at). Inspect tires for cracking, flat spots, or damage.
- Fluids: Check oil level, coolant level, and brake fluid level. Brake fluid absorbs moisture over time — if it looks dark or murky, change it before riding.
- Chain: Check chain tension and lube condition. The heavy storage lube may need to be cleaned off and replaced with your regular riding chain lube.
- Controls: Squeeze the brake levers and clutch lever. They should have normal feel. Stiff or spongy brakes mean the pistons have seized or the fluid needs bleeding. Check throttle return — it should snap closed smoothly.
- Start the engine: Turn on the ignition, wait for the fuel pump to prime (you will hear it on fuel-injected bikes), and start. Let the engine idle until it reaches normal operating temperature. Watch for unusual smoke, sounds, or smells.
- First ride: Take it easy for the first 10-15 minutes. Brakes may need a few applications to clean surface corrosion off the rotors. Tires may have reduced grip until they warm up and the contact patch scrubs in. Ride in a familiar area with light traffic.
Storage Gear Comparison
| Item | Purpose | Top Pick | Price (Approx.) |
|---|---|---|---|
| Fuel stabilizer | Prevents fuel degradation | Sta-Bil Storage (8 oz) | $5-$8 |
| Battery tender | Maintains battery charge | Battery Tender Junior 800mA | $25-$30 |
| Motorcycle cover (indoor) | Dust and scratch protection | Dowco Guardian Indoor | $35-$50 |
| Motorcycle cover (outdoor) | Weather and UV protection | Nelson-Rigg Defender | $50-$80 |
| Disc lock with alarm | Theft deterrence | ABUS Detecto 7000 RS1 | $65-$90 |
| Chain lock | Anchor to immovable object | Kryptonite New York 1210 | $80-$120 |
| GPS tracker | Theft recovery | Monimoto 7 | $130-$170 + $4/mo |
| Corrosion inhibitor | Metal surface protection | ACF-50 (spray can) | $15-$22 |
| Motorcycle dolly | Easy repositioning in storage | Black Widow MC-DOLLY (pair) | $55-$70 |
| Exhaust plugs | Pest prevention | BikeMaster Exhaust Plugs | $6-$10 (pair) |
The complete storage kit (stabilizer + tender + cover + disc lock + corrosion inhibitor + exhaust plugs) runs about $150-$250 depending on brands. That is a one-time investment that protects a bike worth $5,000-$25,000 for years of storage seasons. The battery tender and cover last essentially forever; the stabilizer and corrosion inhibitor are annual consumables under $30 combined. For more on storage best practices, see Motorcycle Safety Foundation.
Need your lift installed?250+ certified installers in all 50 states
Frequently Asked Questions
How long can a motorcycle sit without being started?
With proper preparation (fuel stabilizer, battery tender, fresh oil), a motorcycle can sit for 6-12 months without issues. Without preparation, problems start within 30-60 days. The key is preparation, not duration. A well-prepped bike stored for 8 months will start easier than an unprepared bike parked for 6 weeks.
Best motorcycle storage — Should I start my motorcycle during wint
It is better not to. Starting the engine without riding long enough to reach full operating temperature (15-20 minutes of actual riding) causes more harm than good. A cold start produces condensation inside the engine and exhaust that does not burn off during a short idle. Either ride the bike properly to full temperature or leave it alone until spring.
Do I need fuel stabilizer for winter storage?
Yes. Modern ethanol-blended fuel begins to degrade in as little as 30 days. Ethanol absorbs moisture from the air, causing phase separation that corrodes the fuel system. Add fuel stabilizer to a full tank and run the engine for 5 minutes to circulate it through the entire fuel system.
Should I change the oil before or after storing my motorcycle?
Before. Used oil contains combustion byproducts, acids, and moisture that corrode engine internals during long storage. Fresh oil coats everything with a clean protective film. You do not need to change it again in spring if the bike was properly stored.
Is it OK to store a motorcycle on its kickstand for months?
It works, but it is not ideal. The kickstand angle loads one side of the tires and suspension unevenly, which can create flat spots over months. A center stand, dolly, or lift table keeps the bike upright and distributes weight evenly. If the kickstand is your only option, rotate the front tire monthly.
How do I keep mice and pests out of a stored motorcycle?
Plug exhaust tips with steel wool. Stuff steel wool into the airbox intake (with a reminder tag to remove before starting). Place mothballs or peppermint oil cotton balls around the bike (not on painted surfaces). Set snap traps around the storage area. Check monthly during storage.
Related guides: For moving bikes around the garage during storage, see our motorcycle dolly guide. Our motorcycle ramp guide covers getting bikes in and out of storage locations. For tie downs when transporting to a storage facility, we cover soft loops, ratchet straps, and proper 4-point technique. Need a workspace for pre-storage maintenance? Check our lift table guide, home garage lift guide, and full motorcycle lift selection. For hitch-mounted transport to your storage location, see the hitch carrier guide.